III. Annex (continued)
2. Parts and Tools:
2.1. Summary of needed tools
- Cutting pliers, needle nose pliers
- 5/32-inch hex key
- Black insulating tape, nylon wrap, heat shrink tube.
- Slotted and Phillips screwdrivers.
- 10mm-ring, 9/16-combination and 14mm ring spanners.
- Soldering iron and lead
- Hot melt glue gun and plastic glue
- Driller
- Lighter
- Heating gun
- Multimeter
- Vernier caliper
- SAE cables
2.2. SAE cable
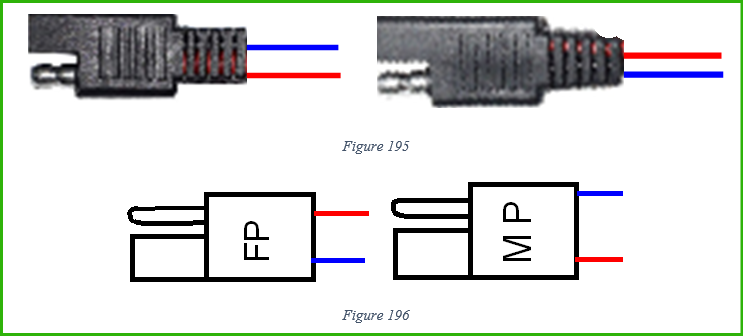
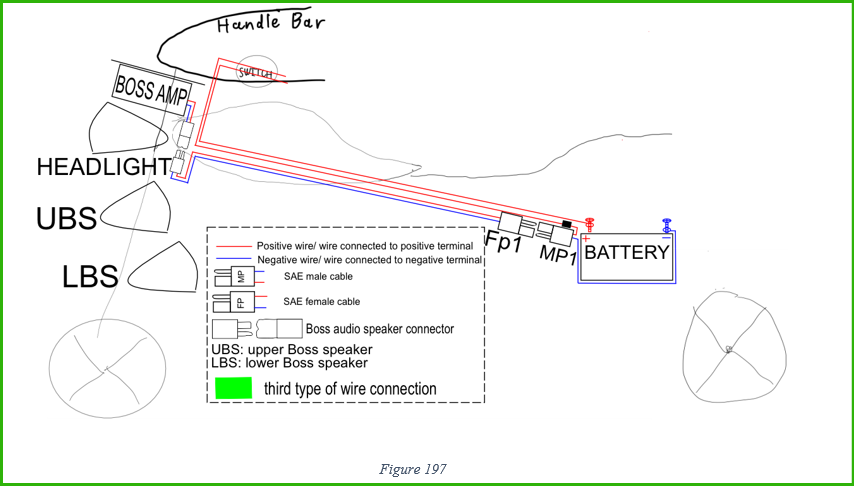
2 pictures in Figure 195 shows the SAE cable in reality, and 2 pictures in Figure 196 shows SAE cable in drawing.
It can be seen from Figure 195 that a SAE head has a plug (not being covered) and a jack (being covered).
Based on this structure, we can define a male SAE cable and a female SAE cable. If a positive wire is connected to the plug, then this is a female SAE cable. If a positive wire is connected to the jack, then this is a male SAE cable.
The reason for this classification is that when two SAE cable are plugged, the active one would be the male one (the one that has electricity in it). This is because we want the active positive port to be covered, or it might touch the chassis, for example, which lead to short circuit (the chassis of a motorcycle is always connected to the battery negative terminal).
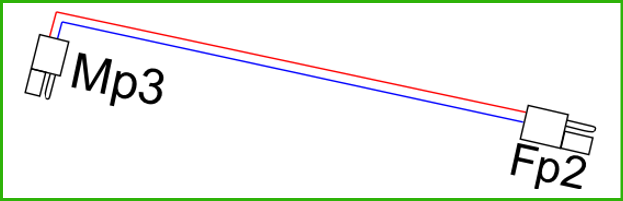
Figure 197 is an example, the MP1 is active.
Some special types of SAE cables will be used in this project:
Female & male SAE cable (see Figure 111, below is the recap of it)
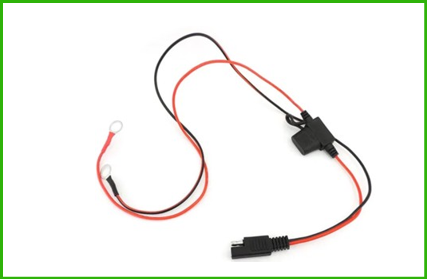
SAE battery connector (see Figure 168, below is the recap of it)
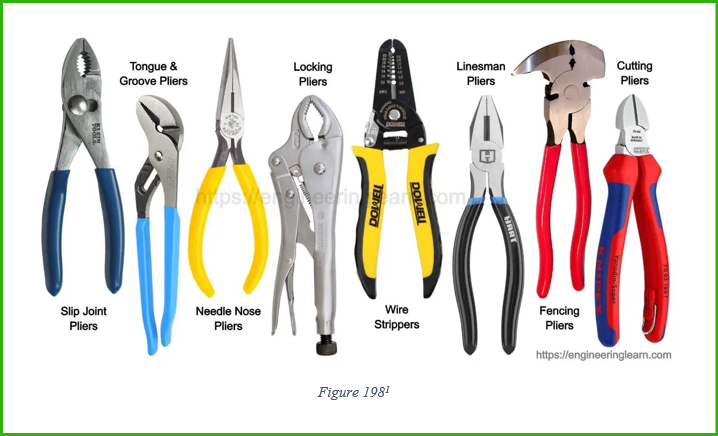
2.3. Types of piler
2.4. Hex Key
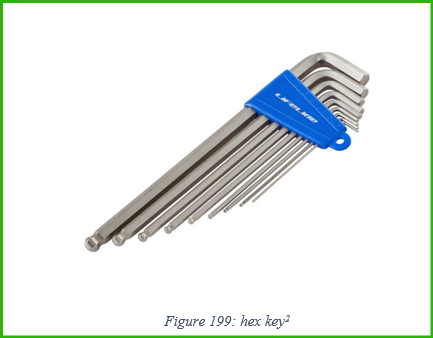
In this project, a 5/32-inch hex key is used.
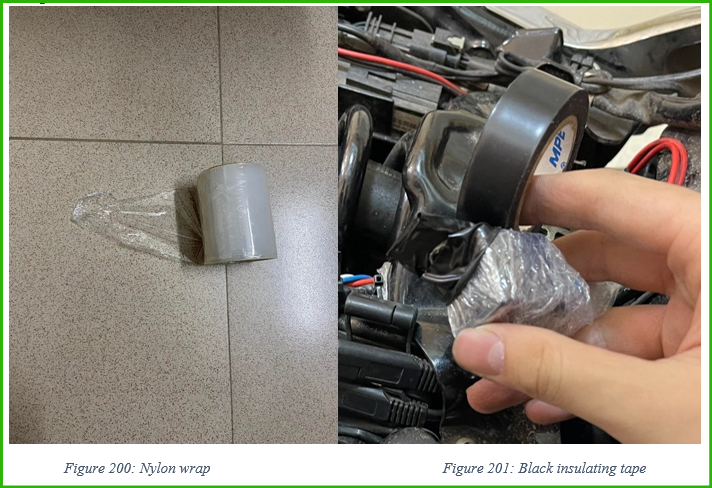
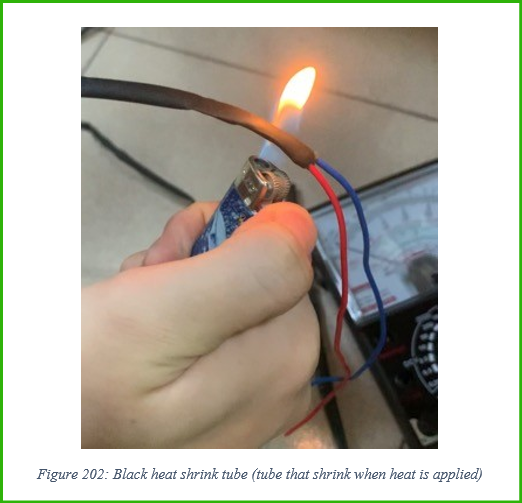
2.5. Wrap and tube.
2.6. Types of heads
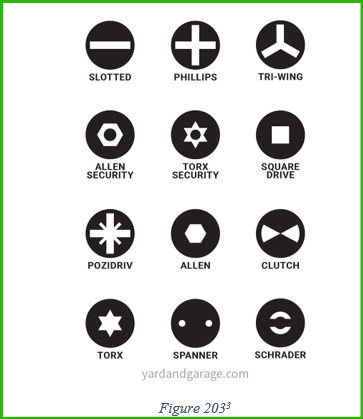
Figure 203 shows types of head that are used with either a screwdriver or a spanner.
In this project, the Slotted and Phillips heads are used with screwdriver.
2.7. Screwdriver and wrench (spanner)
A tool for turning screws, consisting of a handle joined to a metal rod shaped at one end to fit in the cut in the top of the screw.[4]
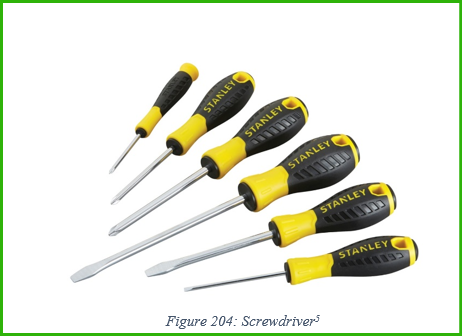
There are many types of screwdrivers depending on types of heads (as aforementioned).
In this project, I used slotted and Phillips-head screwdriver.
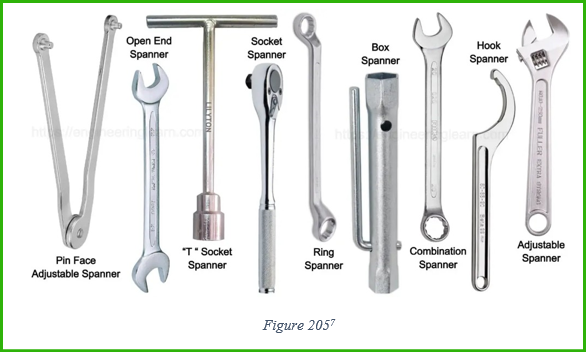
‘Wrench, also called spanner, tool, usually operated by hand, for tightening bolts and nuts’[6], by providing grip and leverage when torque is applied.
There are many types of spanners as below.
In my project, I used 10mm-ring, 9/16-combination and 14mm ring spanner.
2.8. Screw vs bolt and nut
“Bolt: A bolt is an externally threaded fastener designed for insertion through the holes in assembled parts and is normally intended to be tightened or released by torquing a nut.
Screw: A screw is an externally threaded fastener capable of being inserted into holes in assembled parts, of mating with a preformed internal thread or forming its own thread, and of being tightened or released by torquing the head.”[8]
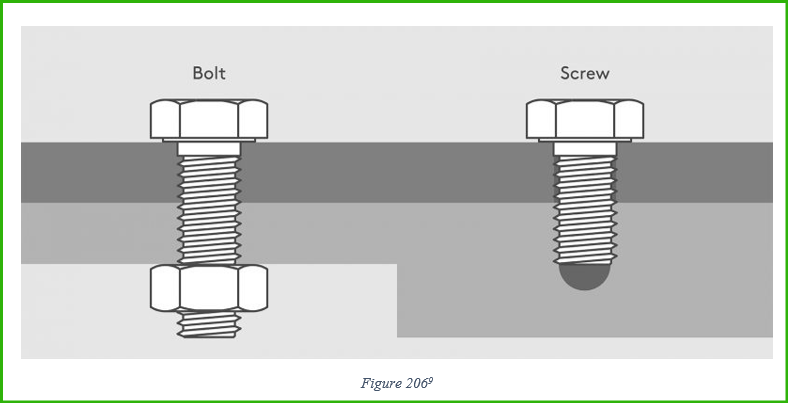
It is possible to use certain types of screws in combination with a nut, in this case I will call the nut the locker. Usually, this nut is used to ensure that the screw will not unscrew itself (due to vibration…).
I will also use either ‘unscrew’ or ‘untighten’ to describe the process of untightening the bolt.
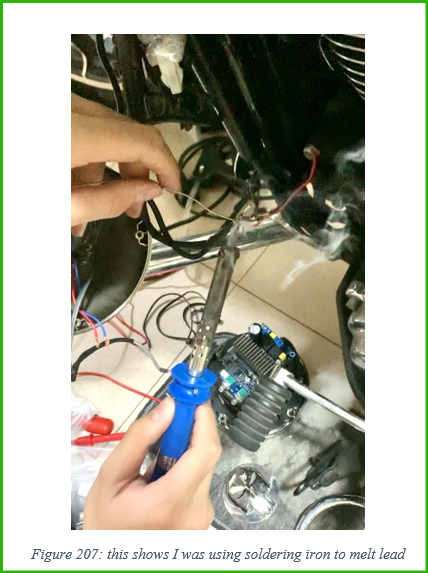
2.9. Soldering iron and lead
Soldering iron is a tool used to melt the lead to join to metal parts together (usually 2 wires).
2.10. Hot melt glue gun
Hot melt glue gun is a tool used to melt the plastic glue, which is pushed through the gun.

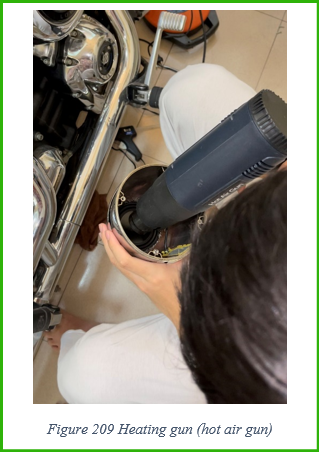
2.11. Heating gun (hot air gun)
This gun passes out very hot air (like a hair dryer, but much hotter)
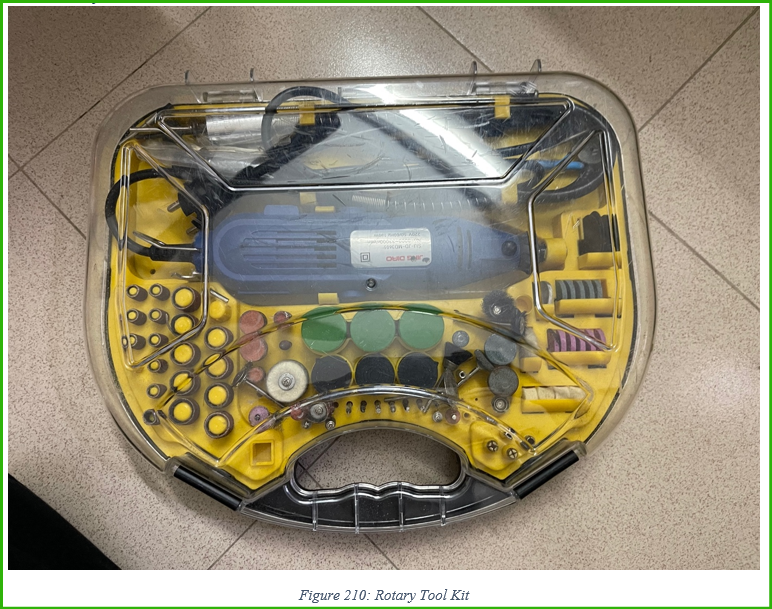
2.12. Rotary Tool Kit
2.13. Vernier Caliper
3. Processing skills:
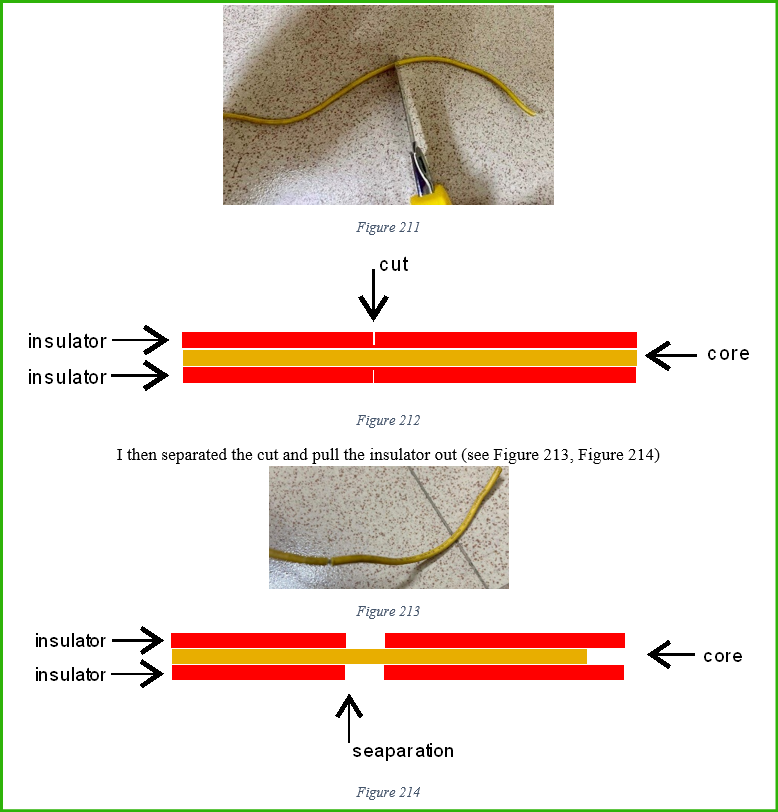
3.1. Wire insulators remove (stripping a wire)
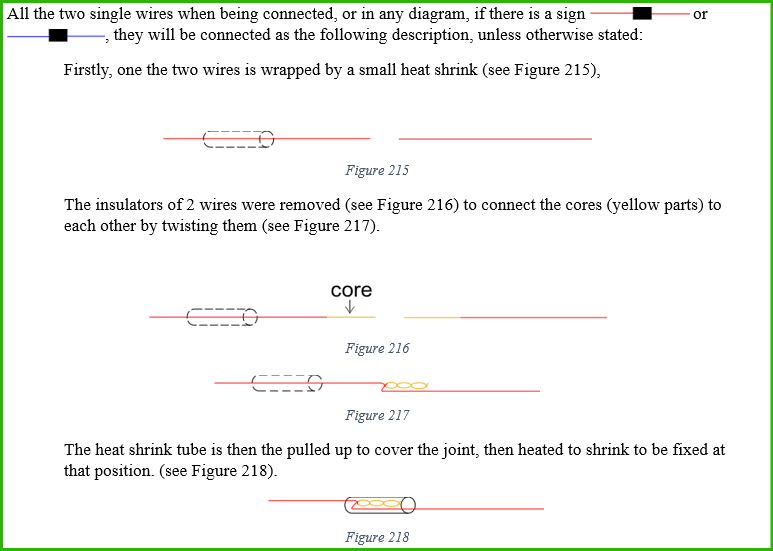
Firstly, I use a sharp knife to dissect the insulator around the wire’s body, and cautiously avoid cutting the wire in order to not damage the core. (See Figure 211, Figure 212; the insulator in Figure 211 is yellow, in Figure 212 is red as labelling)
I have also done some search about stripping a wire, but they are not as efficient as my method. [10] is not relevant to my case, as they were trying to strip a very large, and hard wire. [11] used the linesman plier, whose blade was blunt, so that more force needs applying, which can squeeze the core, and damage it. [12] Used the wire stripper, which suit certain wire diameters only, therefore if my wire’s diameter not exactly the same as the diameter of the wire stripper, my wire can be damaged.
3.2. Wire connection:
3.2.1. First type
3.2.2. Second type
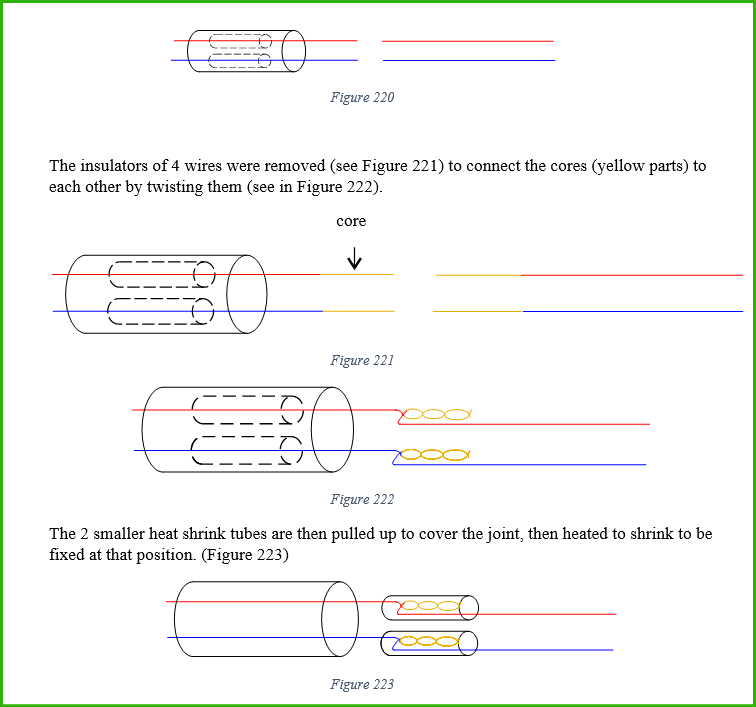
Next, the big heat shrink tube is pulled up to cover the two small heat shrink tubes, then heated to shrink to be fixed at that position. (Figure 224)

3.2.3. Third type
Some of the triples of wires (positive and negative), when being connected in a diagram with a green box (see Figure 225), they will be connected as the following description, unless otherwise stated:
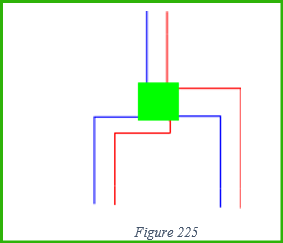
In short, 3 negative wires are connected, and 3 positive wires are connected.
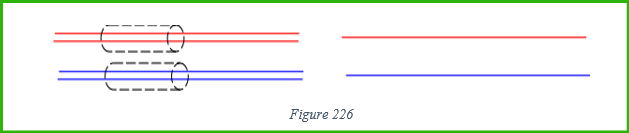
Firstly, I wrapped the wires with small heat shrink tubes as shown in Figure 226.
The insulators of 6 wires were removed (see Figure 227) to connect the cores (yellow parts) to each other by twisting them (see Figure 228).

The 2 small heat shrink tubes are then pulled up to cover the joint, then heated to shrink to be fixed at that position. (Figure 229)

Figure 230 shows a set of wires connected using this method.
Figure 230
3.2.4. Fourth type
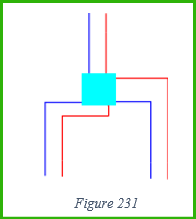
Some of the triples of wires (positive and negative), when being connected in a diagram with a cyan box (see Figure 231), they will be connected as the following description, unless otherwise stated:
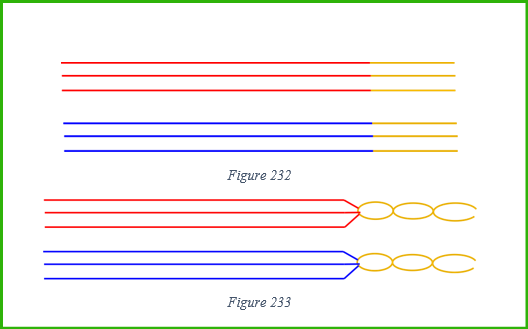
The insulators of 6 wires were removed (see Figure 232) to connect the cores (yellow parts) to each other by twisting them (see Figure 233).
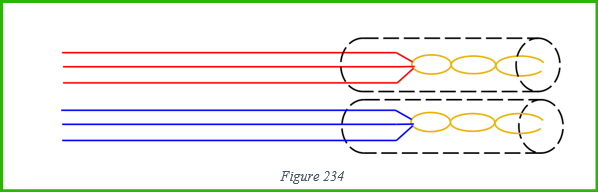
Then 2 small heat shrink tubes are used to cover the joint, then heated to shrink to be fixed at that position (see Figure 234).
Next, the big heat shrink tube is used cover the two small heat shrink tubes, then heated to shrink to be fixed at that position. (Figure 235)
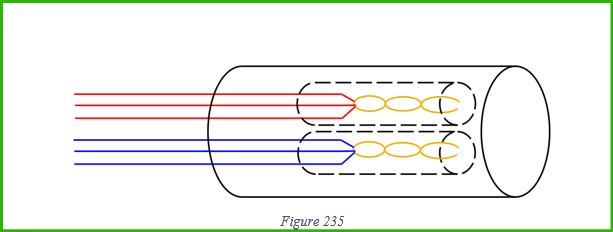
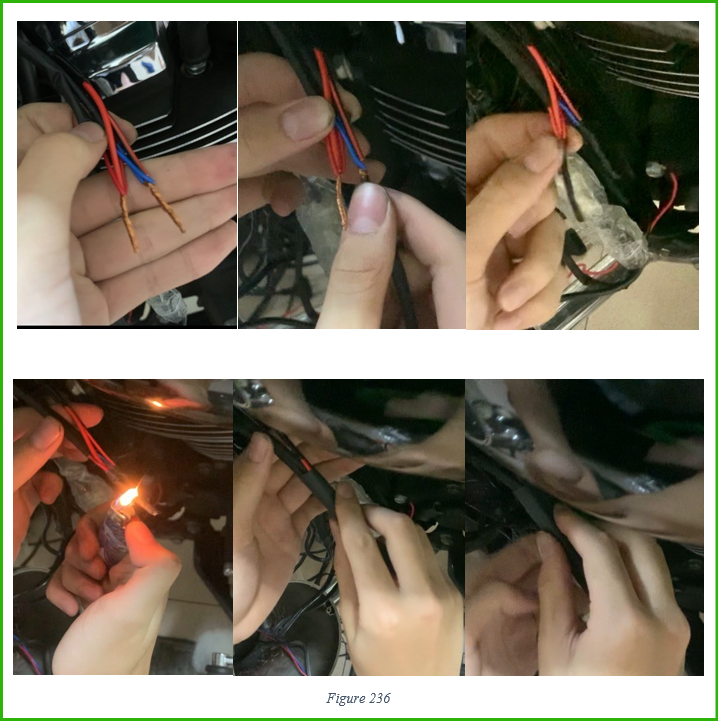
Figure 236 consisting of 6 pictures shows the is connection in reality.
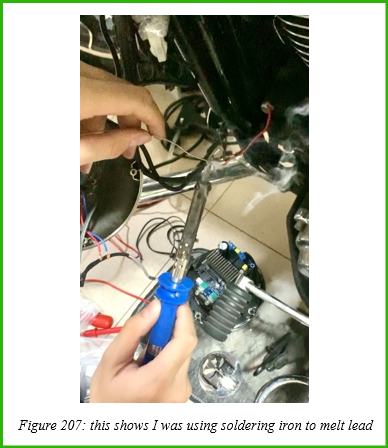
3.3. Soldering lead
Whenever there is this sign at a junction or the phrase ‘being soldering by soldering iron’ or some phrase with similar meaning, it means the two metal parts are placed next to each other. The soldering iron is then used to melt the lead and fix them together. (Figure 207)
3.4. Using hot melt glue gun
I press the trigger to let the plastic glue out and melt it, apply it at the joint of two parts to tick them together. (See Figure 208)

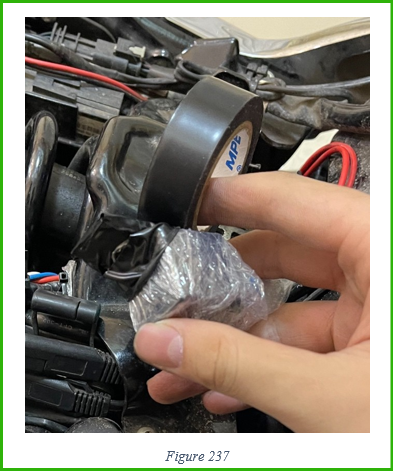
3.5. Tape wrapping with nylon
Tape wrapping an object with nylon allows us to make it water resistant. Moreover, the nylon inside prevents the object from being sticky after the black tape is untaped. To perform such, the object is first wrapped by a nylon wrap, then wrapped by black insulating black tape. (See Figure 237)
3.6. Grinding and cutting
By using Rotary Tool Kit, with different types of head, I can grind or cut.
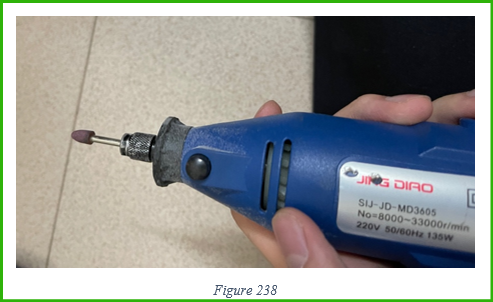
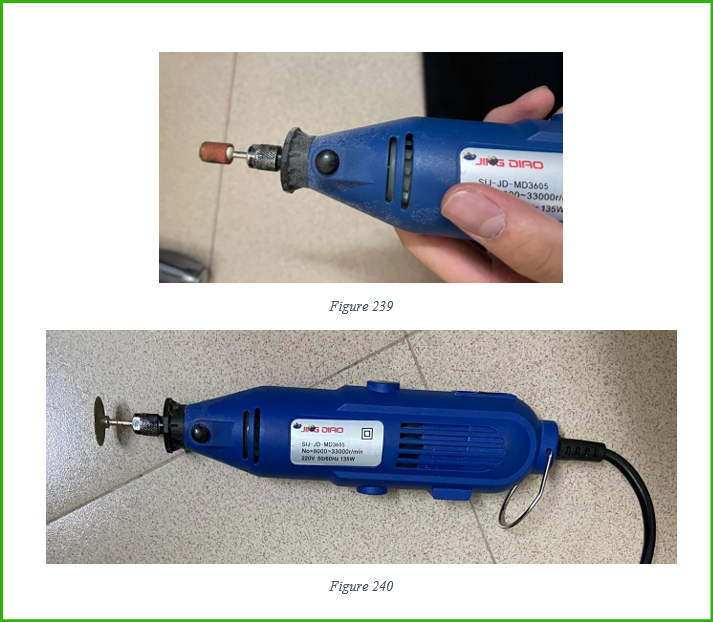
Figure 238 & Figure 239 illustrate different types of head used to grind. The small head (Figure 238) can be used to grind small details. The bigger head (Figure 239) can be used to grind bigger details.
Figure 240 illustrates a type of head being assembled to cut.
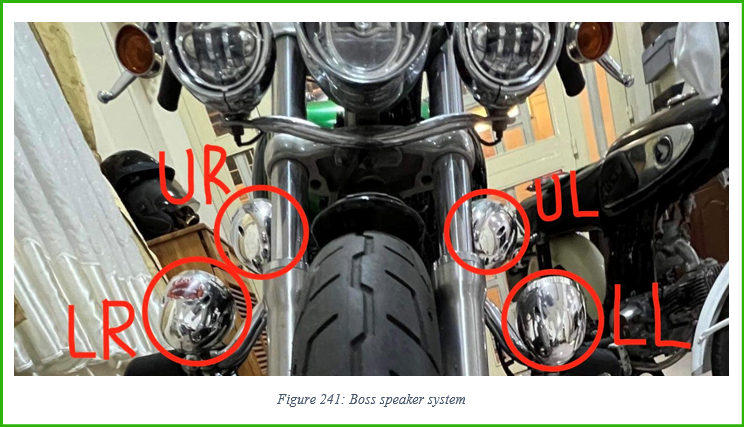
4. Boss Speaker system:
There are 4 Boss speakers, Upper right, upper left, lower right, lower left (see Figure 241)
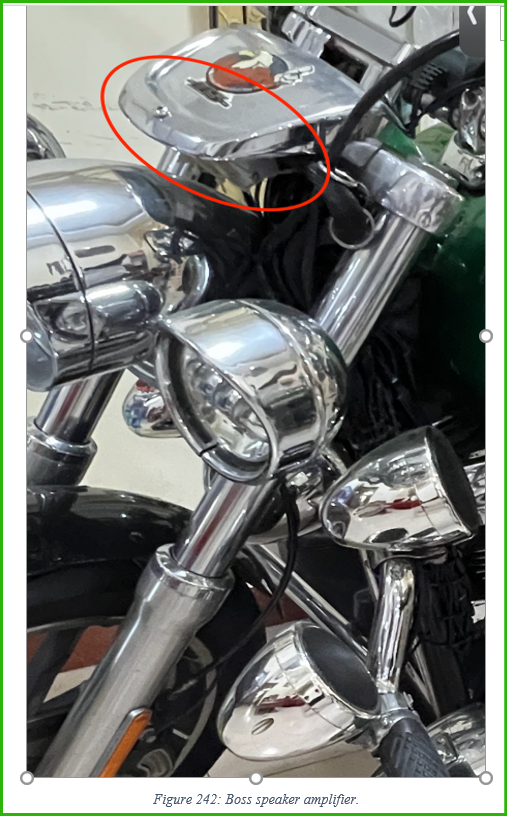
The Boss Speaker amplifier is shown in Figure 242.
[1] This shows types of plier https://engineeringlearn.com/types-of-pliers/ (28 Dec 2022)
[2] Hex wrench or hex key or Allen wrench or Allen key. In this project it is called hex key. https://www.wigglestatic.com/product-media/100218705/LifeLine-Allen-Key-x-9-Ball-End-Set-Allen-Keys-Silver-Blue-LL-AKX9BES-0.jpg?w=1600&h=1600&a=7
[3] https://www.voaci.com/?product_id=5647303_29 (28 Dec 2022)
[4] (Cambridge Dictionary, 2023)
[5]https://twen.rs-online.com/web/p/screwdriver-sets/1252050
[6] Britannica, The Editors of Encyclopaedia. “wrench”. Encyclopaedia Britannica, 11 Nov. 2010, https://www.britannica.com/technology/wrench . Retrieved 12 Aug 2023.
[7] https://engineeringlearn.com/types-of-spanners/ (28 Dec 2022)
[8] (Erik Oberg, 2008) Page 1426.
[9] https://www.tjlituo.com/whats-the-difference-between-bolts-and-screws/ (28 Dec 2022)
[10] https://www.youtube.com/watch?v=EuIjT11xzYs